

The Ultimate Guide to Fashion Photo Editing
Fashion photo editing is one of the most important steps in creating visually appealing and professional looking images. Everyone from photographers to influencers is trying to perfect their photos to stand out. Editing your photos doesn’t just mean applying a few filters, it’s about adjusting the right details, removing distractions, and showcasing the true beauty of your subject. Whether you’re editing for your personal portfolio or commercial use, knowing how to properly edit fashion photos can take your work to the next level. With the right techniques, you can turn simple shots into eye catching visuals that highlight the clothing and the overall aesthetic.
In this guide, we’ll walk you through the key steps of fashion photo editing. From adjusting basic settings like brightness and contrast to more complex edits like skin retouching and fabric details, we’ll cover everything you need to know. You’ll also get tips on how to use the right tools, whether you’re working on a desktop or mobile device. Fashion photo editing can seem overwhelming at first, but with practice, it becomes easier and faster, and the results will speak for themselves. Let’s dive into the process and start creating your perfect fashion images.
Here’s Your Complete Guide to Fashion Photo Editing
Getting Started with Fashion Photo Editing
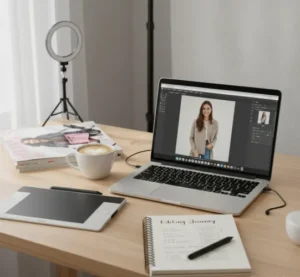 Fashion photo editing requires more than just basic adjustments. It’s a craft that combines creativity with technical skill to produce amazing results. To achieve professional quality edits, understanding the full scope of the editing process is important. From adjusting the lighting and colors to refining details like clothing textures and backgrounds, each step contributes to bringing out the best in your photos. Perfecting these aspects will help you create a cohesive, polished look that aligns with your creative vision.
Tips for editing your fashion photos:
- Start with the Basics: Adjust exposure, contrast, and white balance for a balanced image.
- Retouch Skin Naturally: Use the Healing Brush or Frequency Separation for smooth, subtle skin.
- Highlight Clothing: Improve textures, patterns, and accessories with contrast and sharpness adjustments.
- Manage the Background: Blur or change backgrounds to keep the focus on the subject.
- Export Properly: Use JPEG for online images and TIFF for print to preserve quality.
Key Tools for Fashion Photo Editing
To create professional quality fashion photos, having the right tools is important. These tools help you adjust, refine, and improve every detail of your images. If you’re looking to change the color tone, smooth skin, or sharpen details, the right software makes all the difference. Popular tools include Photoshop, Lightroom, and various mobile apps, each offering unique features for different editing needs. Learning how to effectively use these tools will help you save time and achieve the desired result faster. The key is knowing which tool to use for each specific task to get the best results without compromising quality.
 Popular tools you can use for fashion photo editing:
- Adobe Photoshop: Advanced retouching and background edits.
- Lightroom: Easy color correction and image improvement.
- Take One: Powerful color grading, ideal for studio shoots.
- Snapseed: Mobile app for quick edits with filters and tools.
- VSCO: Simple filters and tools for fast, artistic adjustments.
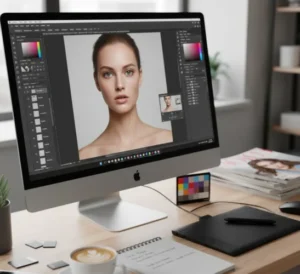
Editing Skin and Facial Features
One of the most common tasks in fashion photo editing is skin retouching. It’s important to get skin editing right to make sure the final image feels polished but still natural. The goal is to smooth out blemishes and imperfections without making the skin look overly airbrushed. Tools like the Healing Brush or Clone Stamp in Photoshop are ideal for removing blemishes, acne, or stray hairs. You can also use frequency separation techniques for more advanced skin smoothing.
When retouching facial features, keep in mind that less is more. The idea is to subtly improve the subject’s natural beauty rather than erase it. Focus on areas that need refinement, like brightening the eyes or softening shadows. You can also sharpen the details in certain areas of the image, such as the eyes or lips, to make them stand out. Remember, the key is to make the skin look flawless, but still real.
 Few tips when editing skin and facial features:
- Use Healing Tools: Remove blemishes with Healing Brush or Clone Stamp.
- Subtle Skin Smoothing: Smooth skin gently with Frequency Separation or Surface Blur
- Brighten the Eyes: Lighten whites and sharpen the iris to make eyes pop.
- Improve Facial Structure: Use Dodge and Burn to highlight features.
- Avoid Over Smoothing: Keep a natural, glowing look without overdoing it.
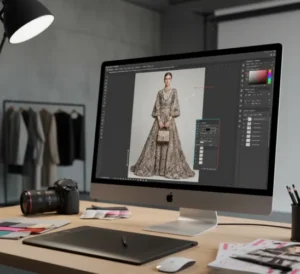
Refining Clothing and Accessories
Fashion photo editing is an important skill for anyone in the fashion industry, whether you’re a photographer, editor, or content creator. The goal of this process is to refine an image in a way that highlights the clothing, accessories, and model, making sure everything looks polished and professional. While it might seem overwhelming at first, learning the basics and applying the right techniques will give you the power to transform any photo into a stunning piece of visual art. Each edit, whether it’s adjusting brightness, smoothing skin, or enhancing clothing details, plays a role in telling the story of the brand and showcasing the beauty of the fashion.
 Tips for refining clothing and accessories:
- Improve Fabric Textures: Use contrast and sharpness adjustments to highlight textures like silk, denim, or knitwear.
- Detail the Accessories: Make sure items like jewelry and handbags are sharp, adding to the overall look.
- Subtle Adjustments: Use the Dodge and Burn tools to add dimension to the clothing and accessories without making them look flat.
- Smooth and Define: Tweak wrinkles or creases in the clothing without altering the natural flow of the fabric.
Perfecting the Background
The background of a fashion photo is just as important as the model and clothing. Whether you’re shooting in a studio with a clean, simple backdrop or outdoors with a busy scene, the background should complement the subject, not overpower it. In some cases, you may want to remove or blur the background to keep the focus on the model and clothing.
Photoshop’s “Select and Mask” tool allows you to easily isolate the subject from the background, making it possible to replace or modify the background. You can also use the Gaussian Blur effect to add a smooth, out of focus look to the background, drawing more attention to the main subject. If you’re working with an outdoor shot, you might want to adjust the background’s lighting or color to match the tone of the photo. Remember, the background should support the story you want to tell, not distract from it.
Exporting Your Fashion Photos
Once you’ve completed all your edits, it’s time to export your photo for sharing or printing. Exporting is an important step in the editing process, and it’s better to choose the right settings to ensure your photo looks great on any platform. For social media, exporting in JPEG format with a high resolution will allow you to keep the quality without making the file too large. If you’re printing the photo, you’ll want to use a TIFF format with the highest resolution available to preserve all the details.
 Tips for exporting fashion photos:
- Use JPEG for Web: High resolution (300 dpi) JPEGs for online use.
- Choose TIFF for Print: Preserve details and sharpness for prints.
- Check Resolution: 300 dpi for print, 72 dpi for web.
- Adjust Image Size: Resize for web or social media while keeping sharpness.
- Export with Correct Color Space: sRGB for web, Adobe RGB for print.
Conclusion
Fashion photo editing is an important skill for anyone in the industry, if you’re a photographer, editor, or content creator. Having the right editing techniques, you can transform basic images into professional, eye catching visuals that highlight the clothing, accessories, and the overall aesthetic of the photo. The process is more than just applying filters; it involves careful adjustments to exposure, color, skin, clothing, and background to bring out the best in each shot. With the right tools, such as Adobe Photoshop, Lightroom, and mobile apps like Snapseed, you can refine every detail to create polished images. Practice and patience are key to mastering these techniques, and the more you experiment, the better your edits will become.
Read Next: Step by Step Guide to Newborn Photo Editing Techniques


